Clean Earrings: I used to wonder why my favorite earrings always looked dull and lifeless, even though I stored them carefully. It wasn’t until I noticed the grime building up in the tiny crevices of my studs that I realized — I had never actually cleaned them properly. Not once.
That small realization changed everything about how I care for my jewelry now. And honestly, cleaning earrings at home is one of the easiest things you can do to keep them looking brand new for years.
If your earrings have been sitting in a drawer looking less than their best, this guide is for you. I’ll walk you through every method I’ve tried — from simple soap and water to surprising kitchen ingredients — so you can bring your earrings back to life without spending a rupee at a jewelry store.
Read Also: Clarifying Shampoo: Benefits, Risks, How To, Costs & Best Picks
Why Do Earrings Get Dirty?
Before I figured out the right way to clean my earrings, I never stopped to think about why they got dirty in the first place. Now I know — and once you understand it, you’ll never skip cleaning them again.
Earrings collect dirt from multiple sources every single day:
- Skin oils and sweat that transfer from your earlobes throughout the day
- Makeup, foundation, and hairspray that settle into the metal and stones
- Dead skin cells that build up around earring posts and backs
- Dust and environmental pollutants that cling to the surface over time
This buildup doesn’t just make your earrings look dull — it can also irritate your piercing, cause infections, and even speed up tarnishing on metal. The good news? You can fix all of this at home in under 10 minutes.
What Things You’ll Need
When I first started cleaning my earrings at home, I was surprised by how simple the supplies were. You don’t need anything fancy — chances are you already have everything in your kitchen or bathroom right now.
Here’s what you’ll want to gather before you start:
- A small bowl
- Lukewarm water
- Mild dish soap or baby shampoo
- A soft-bristled toothbrush (an old one works perfectly)
- A lint-free cloth or microfiber towel
- Rubbing alcohol (optional, for metal earrings)
- Cotton swabs for detailed cleaning
- Baking soda, white vinegar, or hydrogen peroxide (depending on the method you choose)
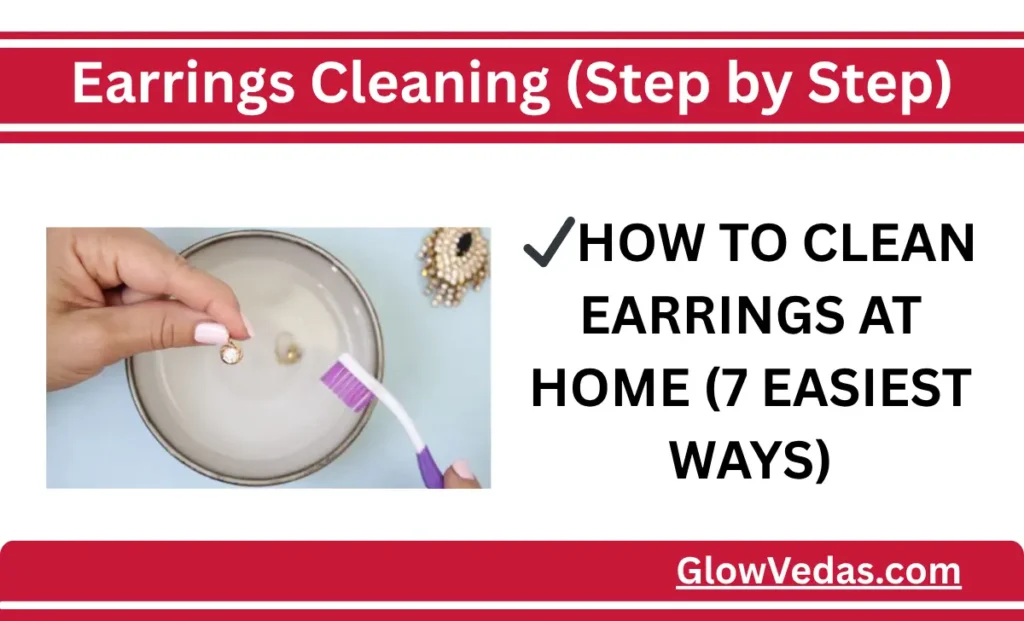
How to Clean Earrings at Home (Step-by-Step)
Once I nailed down this method, I started doing it every two to three weeks — and the difference in my earrings was immediately visible. Here’s exactly how you can do it too:
Method 1: Soap and Warm Water (Best for Everyday Cleaning)
This was the first method I ever tried, and honestly, it’s still my go-to for regular maintenance. It’s gentle enough for most earring types and effective enough to remove everyday grime.
- Fill a small bowl with lukewarm water and add two to three drops of mild dish soap or baby shampoo.
- Place your earrings in the solution and let them soak for 5 to 10 minutes.
- Use a soft-bristled toothbrush to gently scrub around the post, backing, and any decorative details.
- Rinse each earring under a gentle stream of lukewarm water — do this over a bowl, not the sink drain.
- Pat dry with a lint-free cloth and let them air dry completely before storing.
Best for: Gold, silver, diamond, and most metal earrings. Avoid soaking pearls and costume jewelry.
Method 2: Baking Soda Paste (Best for Tarnished Silver)
I discovered this method when my silver hoops turned almost completely black after sitting unused for months. I was skeptical, but baking soda genuinely works like magic on tarnished silver.
- Mix one tablespoon of baking soda with just enough water to form a thick paste.
- Apply the paste onto your earrings using a soft toothbrush or your fingertip.
- Gently scrub in small circular motions, focusing on tarnished or darkened areas.
- Rinse thoroughly with lukewarm water and dry immediately with a soft cloth.
You’ll notice the cloth picks up a dark residue — that’s the tarnish coming off. Your earrings should look noticeably brighter and shinier after this.
Best for: Sterling silver and white gold earrings. Avoid using on pearls, opals, or plated jewelry.
Method 3: White Vinegar Soak (Best for Deep Buildup on Metal)
When soap and water wasn’t cutting through the stubborn buildup on my older gold earrings, I turned to white vinegar — and it surprised me with how well it worked. The mild acidity dissolves mineral deposits and grime without being too harsh on metal.
- Pour half a cup of white vinegar into a small bowl.
- Add one tablespoon of baking soda — it will fizz, and that’s completely normal.
- Drop your earrings in and let them soak for 2 to 3 minutes. Don’t leave them longer than this.
- Remove and gently scrub with a soft toothbrush.
- Rinse well with lukewarm water and dry thoroughly.
Best for: Gold and silver earrings with heavy buildup or mineral deposits. Not suitable for pearls, gemstones with glued settings, or costume jewelry.
Method 4: Rubbing Alcohol (Best for Sanitizing and Hygiene)
This is the method I use specifically when I want to disinfect my earrings rather than just clean them — especially after buying second-hand jewelry or after recovering from an ear infection.
- Pour a small amount of rubbing alcohol (70% isopropyl) into a bowl or onto a cotton pad.
- Soak the earring posts and backs in the alcohol for about 5 minutes, or wipe them down thoroughly with the cotton pad.
- Let the earrings air dry completely — do not rinse, as the alcohol evaporates on its own and continues sanitizing as it dries.
This method doesn’t remove visible dirt or tarnish, so you’ll want to combine it with the soap-and-water method first if your earrings also need a visual clean.
Best for: Metal posts and backs for sanitizing purposes. Avoid using on pearls, porous stones, and plated fashion jewelry as alcohol can strip the finish.
Method 5: Hydrogen Peroxide (Best for Stubborn Grime and Disinfecting)
I started using this method after reading that hydrogen peroxide is gentler than alcohol but just as effective at killing bacteria. It’s particularly useful for earrings with detailed engravings or prong settings where grime tends to hide.
- Pour a small amount of 3% hydrogen peroxide (the standard drugstore concentration) into a bowl.
- Soak your earrings for 5 to 10 minutes.
- Use a soft toothbrush to dislodge any loosened dirt from crevices.
- Rinse with lukewarm water and dry completely.
The solution will bubble slightly on contact with organic material like skin cells or oils — that’s it doing its job.
Best for: Gold and silver earrings with intricate detailing. Not suitable for pearls, opals, turquoise, or any porous or organic gemstones.
Method 6: Club Soda or Sparkling Water (Best for Diamond and Gemstone Earrings)
This one surprised me when I first heard about it, but the carbonation in club soda is genuinely effective at loosening dirt from gemstone settings without any risk of damage.
- Pour club soda or plain sparkling water into a small bowl.
- Drop your diamond or gemstone earrings in and let them soak for 5 minutes.
- Gently scrub with a soft toothbrush, paying attention to the area around and beneath the stone.
- Rinse with fresh water and dry with a lint-free cloth.
This method is especially satisfying for diamond studs — you’ll see an immediate difference in sparkle.
Best for: Diamond, sapphire, ruby, emerald, and other hard gemstone earrings. Not recommended for pearls, opals, or soft stones.
Method 7: Damp Cloth Wipe (Best for Pearls and Delicate Earrings)
Pearls are the one type of earring that taught me to throw out almost every standard cleaning rule. When I soaked a pair of pearl earrings in water the same way I cleaned my gold ones, the surface started to look cloudy and dull. Pearls are organic and porous — they need a completely different approach.
- Dampen a soft, lint-free cloth with plain water — just barely damp, not wet.
- Gently wipe each pearl in a single direction rather than scrubbing in circles.
- For extra luster, add a tiny drop of olive oil or baby oil to the cloth before wiping.
- Let the pearls air dry fully in a flat position before storing them.
The same gentle wipe method also works well for costume and plated jewelry that can’t handle soaking or chemicals.
Best for: Pearls, mother-of-pearl, coral, turquoise, opal, and all fashion or plated earrings.
How to Clean Different Types of Earrings
I made the mistake early on of cleaning all my earrings the same way. A few pairs paid the price. Here’s a quick reference for what works best with each material:
- Gold earrings — soap and water, vinegar soak, or rubbing alcohol for posts
- Silver earrings — baking soda paste for tarnish, soap and water for regular cleaning
- Diamond earrings — club soda soak, followed by a gentle toothbrush scrub
- Pearl earrings — damp cloth wipe only, never soak
- Costume/fashion jewelry — damp cloth wipe, dry immediately
- Gemstone earrings — club soda or mild soap, avoid harsh chemicals near the setting
How Often Should You Clean Your Earrings?
When I first got into the habit of cleaning my earrings, I wasn’t sure how frequently I needed to do it. After some trial and error, here’s what works:
- Earrings you wear daily — clean every 1 to 2 weeks
- Earrings you wear occasionally — clean before and after wearing
- Earrings stored for long periods — clean before putting them back in your jewelry box and before wearing again
Don’t forget your earring backs — they come in direct contact with your skin and tend to accumulate the most buildup, yet they’re almost always the most forgotten part.
What You Should Never Do
I’ve learned a few lessons the hard way. Save yourself the trouble — here are the things you should always avoid when cleaning earrings at home:
- Never use toothpaste — it’s abrasive and will scratch softer metals and stones
- Never use bleach or harsh chemical cleaners — they corrode metal and damage gemstone settings permanently
- Never soak pearls, opals, or porous stones — water seeps inside and causes cracking, dulling, or peeling
- Never use hot water — it warps delicate materials and loosens glued-in stones
- Never skip drying — putting earrings away while still damp accelerates tarnishing and rust
Tips to Keep Your Earrings Clean Longer
Cleaning is important — but prevention is even better. Once you’ve got your earrings looking their best, here’s how you can keep them that way between cleanings:
- Put your earrings on after applying makeup, perfume, and hairspray — not before
- Remove earrings before swimming, showering, or exercising
- Store earrings in a dry, airtight jewelry box or pouch to reduce tarnishing
- Wipe earrings down with a soft cloth after each wear to remove surface oils
- Keep individual pairs separated to avoid scratches
Takeaway
Looking back, I wish someone had told me sooner how many simple ways there are to clean earrings at home. I spent years buying new pairs because my old ones looked worn out — when all they really needed was the right method and five minutes of attention.
Now that you know seven different cleaning methods, which materials they work best for, and what mistakes to avoid — keeping your earrings sparkling is entirely in your hands. Start with whichever method suits your earring type, set a reminder to do it regularly, and give your jewelry the care it deserves.
Your earrings — and your earlobes — will thank you for it.
Other Useful Links: Gold Earrings – Latest Designs for Men & Women
Priya is a dedicated skincare enthusiast and wellness researcher with over 10 years of experience in the beauty industry. She specializes in analyzing cosmetic formulations and simplifying complex skincare routines for everyday use. Through Glowvedas, she aims to empower readers with science-backed advice and honest reviews to help them achieve their most radiant self.